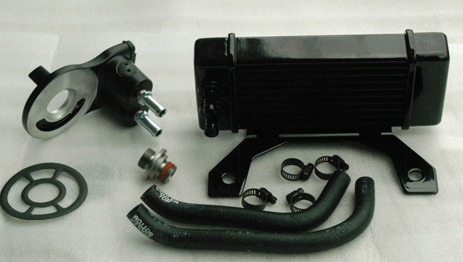
If you’re using the Harley-Davidson Oil Cooler Kit part
number 26082-05 you will also have to purchase a oil
filter part number 63798-99. We covered installing
another factory/ touring oil cooler system in the King
reports, but since then some people had problems with
the original system and the factory developed this
upgrade. That’s why we’re bringing it to you, so you’ll
have the latest.
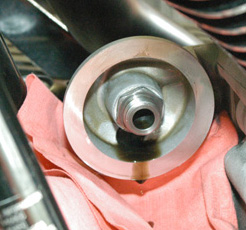
Here’s a shot of the original oil filter removed from
the stock bracket. The new bracket fits over this one.
You will also need the following tools:</ center>
Oil Filter Wrench HD-44067-A – This tool is needed so as
not to damage the crankshaft position sensor.
3/8 Drive Inch lbs. Torque Wrench or Equivalent
6-inch, 3/8 Drive Extension
7/16 Allen Wrench with a 3/8 drive
7/16 3/8 Drive Socket
7/8 Socket
Common Screw Driver
A pair of side cutters to remove plastic wire ties. You
will also need replacement wire ties not supplied with
kit.
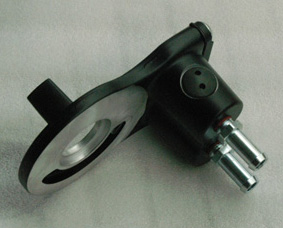
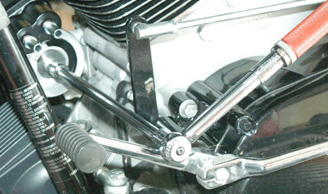
Here’s the oil filter fitting being removed to allow the
new fitting and bracket (above) to be installed.
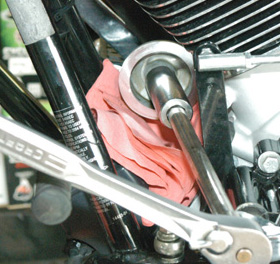
Start by placing a drain pan under the motorcycle and
remove the original oil filter. Use the 7/8 socket to
remove the stock oil filter adapter. Clean all surfaces.
Here’s the new bracket dropping into place over the
gasket. Make sure the oil line fittings are on top and
that the gasket was aligned properly.
Install the gasket on the Oil Adapter Assembly being
sure to position it over the Flange through the smaller
opening and check alignment.
Place Adapter onto original oil filter mount, paying
attention to the gasket. Install the new Oil Adapter
Fitting with the coated thread facing inward. Using the
7/16 Allen socket and torque wrench tighten to 160 inch
lbs and then to 190 inch lbs.
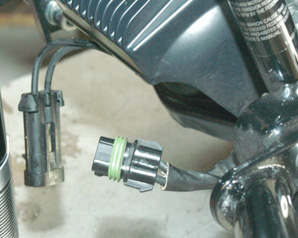
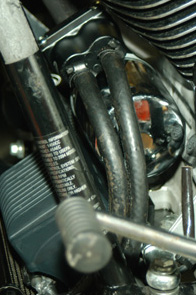
I needed to disconnect the stator plug to install the
oil cooler to the regulator mounts and reroute the
wires.</ I>
Remove and disconnect the stator/regulator connector
from the bottom of the regulator. Remove voltage
regulator mounting nuts. Raise regulator and re-route
wires to the inside of the regulator mount and under
stabilizer link.
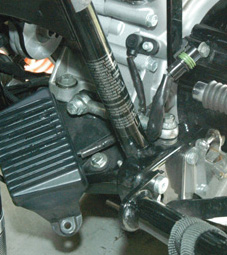
Install the Oil Cooler onto the regulator mounting
studs. Replace the voltage regulator. Check alignment of
all parts and tighten the fasteners to 84 inch lbs, then
re-torque to 120 inch lbs.
Re-connect wiring, check that it does not touch or rub
on anything and wire-tie it in place to bottom of mount.
Lubricate the oil filter rubber gasket and install
filter by hand. After the filter bottoms out use the
filter tool to turn an additional 1/4 turn (I prefer to
handle installation by hand). It’s easy to over tighten
filters. You will note the cut out in the tool just
clears the Crankshaft Position Sensor.
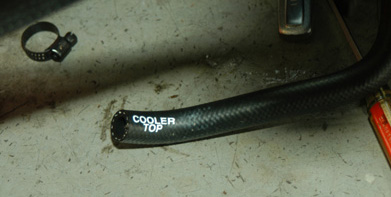
The factory makes it simple, by coding the lines. Even I
couldn’t fuck-up.
Using any other type of tool could cause damage. The oil
lines are clearly marked as to where they go.
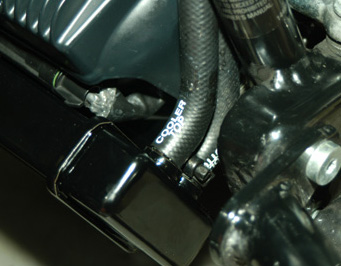
Spray a little WD-40 or oil on the inside of the hoses
and install. If possible slip the hose clamps in place
first. Check clamps for easy access to tightening screw
and tighten.
It would not hurt to check oil level at this time.
Realize that the oil filter will use some as it fills
up. Start engine and check for oil leaks. After oil
light goes out continue to run until engine is warm. The
Oil Cooler should get warm to the touch.
If it does not stop engine and check for obstruction.
Recheck oil. Enjoy your new cooler. After you’ve ridden
500 miles tighten the hose clamps once more. They will
seat themselves into the hose material. Also double
check for leaks. These coolers will reduce the
temperature of the oil by almost 10 degrees. Twin Cams
run hot. Reducing the oil heat means that the oil will
do a better initial lubricating job and last longer.
--Rogue
Motorcycle Hall Of Fame Member 2005
www.bikerrogue.com
This
article is
from
BikerNet.com